
Custom Inventory (WIP)
Before you create any inventory pages with the plugin, here is a quick overview of what it does/doesn't do.
This plugin will allow you to create WordPress pages that display inventory listings filtered the way you want. These pages are NOT connected to the editor and all front end content will have to be edited through the appropriate files, similar to a custom post type. The editor can only be to be used to change the Page title, meta, and social media information on the page. This info can also be changed within the plugin itself.
This plugin will pull in data from crmid's attached to accounts in Sandhill's Cloud Inventory Management. Once you have all your desired data and pages setup, you MUST setup a cron job, or a Sandhill's timer to run updates on the inventory. This data is not pulled in from a database for each page load, it has stored JSON retrieved from API calls. The only way to ensure the inventory on your site is up to date is to have one of these update services setup and working properly. (The developer for the site should be in charge of this task)
Dashboard
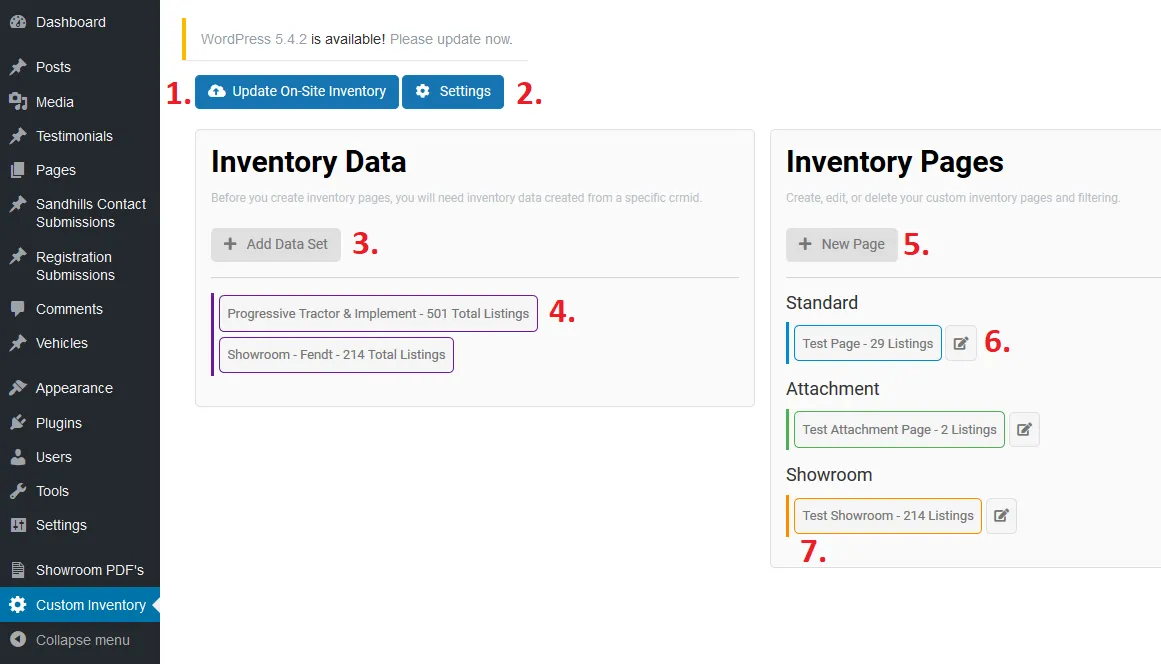
- Update button - Updates all the inventory data and pages to the latest available inventory management data from the cloud
- Settings - Add email recipients for inventory contact submissions
- Add Data Set button - Links to the "Add Inventory Data" page
- Inventory Data Info link - links to the info page specific to that data set
- New Page button - Links to the "Add Inventory Page" page
- Edit/Info Inventory Page button - Links to the corresponding page where you can view and edit info about a specific inventory page
- Inventory Page link - links to the inventory page on the front end
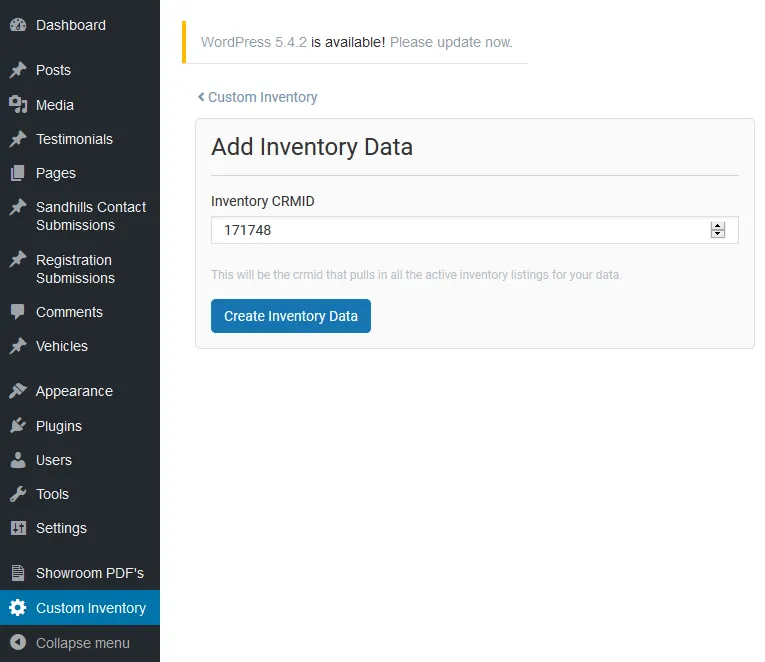
Add Inventory Data
- Start by clicking the "+ Add Data Set" button on the dashboard page
- Enter a valid crmid attached to the account you want inventory from
- Click the "Create Inventory Data" button
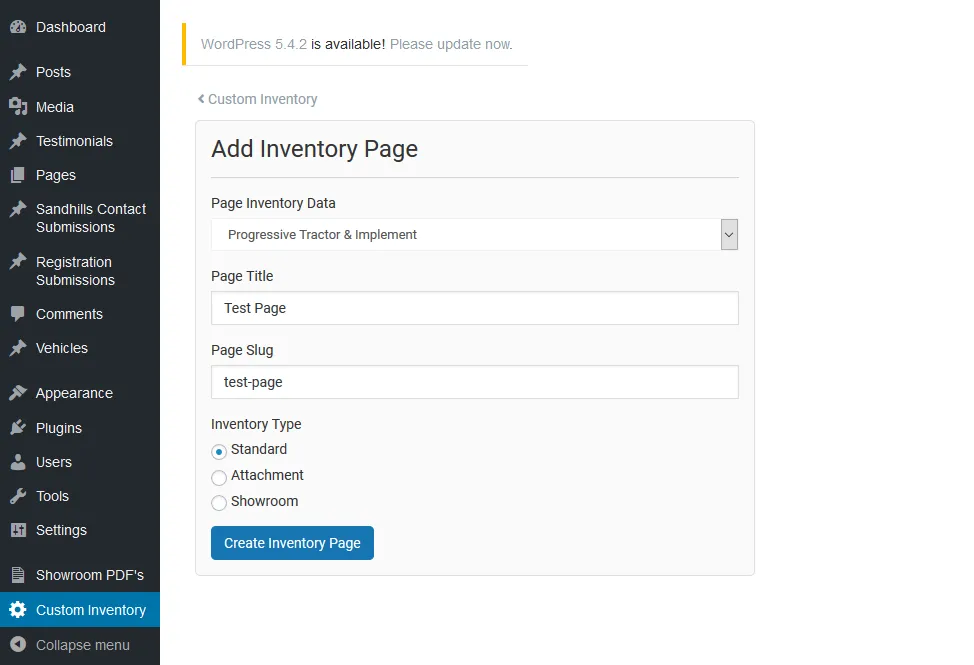
Add an Inventory Page
- Click the "+ New Page" button on the dashboard page
- Enter your desired page credentials, and choose what Data set you want your inventory page to use
- Click the "Create Inventory Page" button
Add Inventory Page Filtering
- Once your inventory page is created, you will be brought to the info page related to the inventory page
- This is where all the page info is found, and where you can edit and add info to the page
- We will go over the page basics later
- Start by clicking the "+ Add Filter" button on the right side of your inventory information page
Adding filtering is the most important part of creating an inventory page, since it determines what will be displayed on the page. When adding filters, knowing how they are added is important for successfully managing certain content you want on the page. First, the filter types you can choose from.
Filter Types
- Standard
- Select a standard parameter and value
- Spec
- Select a specification parameter and value
- Ranged
- Select a parameter and the range of values you want
- Contains Keyword
- Select a parameter and a keyword value you want to have contained within the value
- Attachment Fits-To
- Category
- Select what category type and specific category that should fit to the attachment
- Manufacturer
- Enter in the Manufacturer that the attachment fits to
- Model
- Enter in the Manufacturer & Model that the attachment fits to
One of the most important steps is to choose how a filter will be added, there are 3 options you can choose from.
Apply Filtering
- Add
- Will create a set of inventory from the filter, and add it to the page
- All
- Added inventory required ***
- Will apply this filter to all the existing added inventory
- Most commonly used for over-arching filters such as Condition, ranged filters, Category, Manufacturer etc.
- Exclude
- Added inventory required ***
- Will create a set of inventory from the filter that will be excluded from the page
Update Page
- Once you have all the filters you want added to your inventory page, you will need to update the data from the cloud
- On the inventory information page, click the "Update Page Inventory" button, you will receive a confirmation message with the total amount of listings found that match your filters
Inventory INFO Page Breakdown
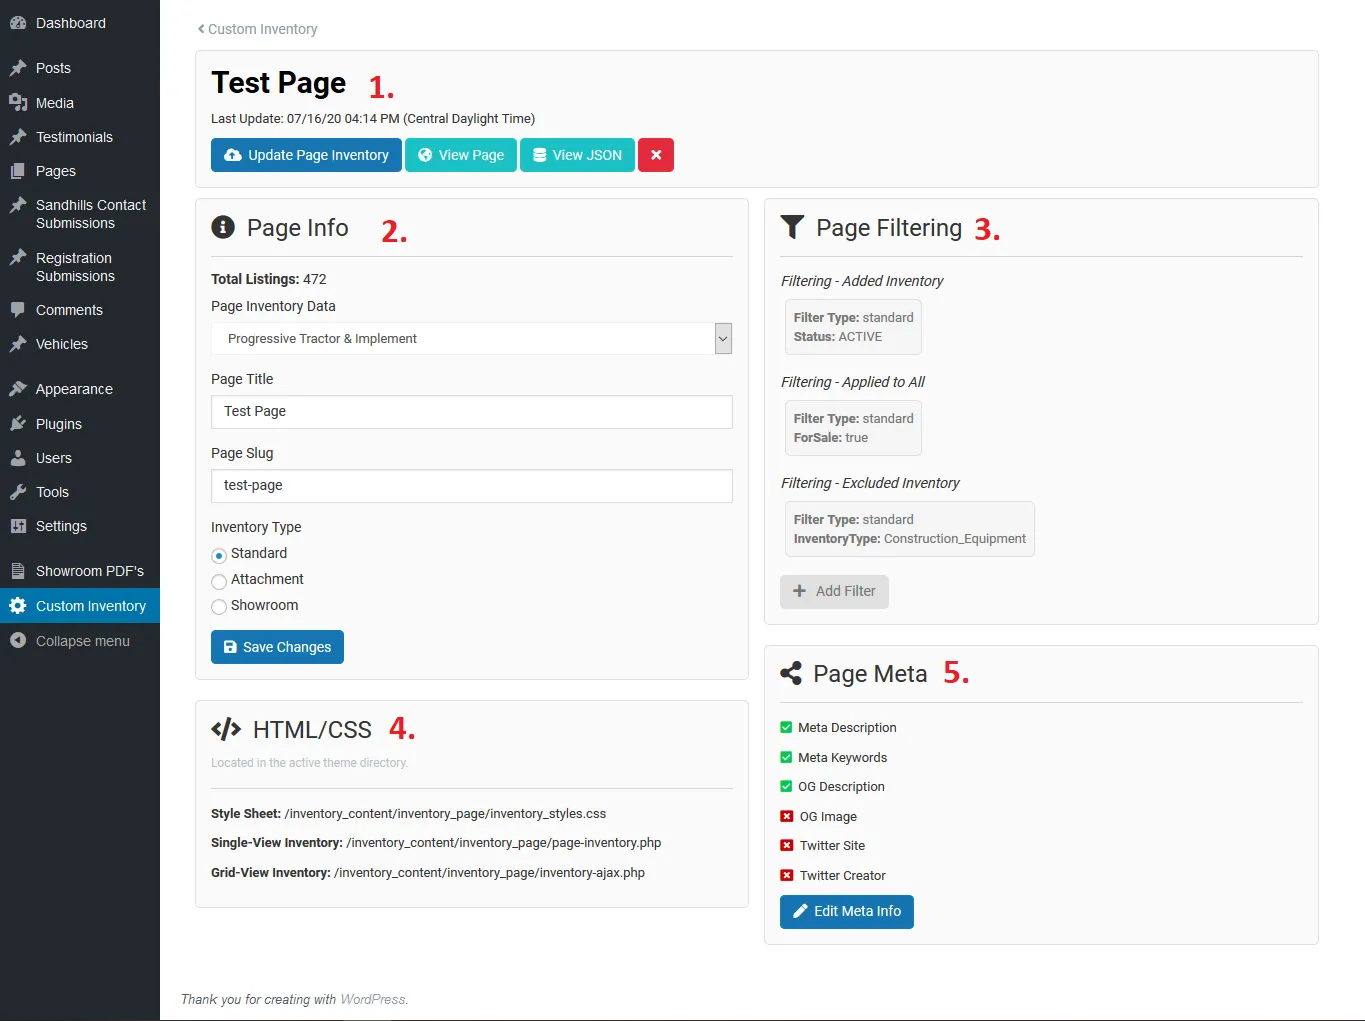
- Page title, update page inventory, link to page, view raw JSON data, delete page
- Page Info - Change the page data source, title, slug, and inventory type
- Page Filtering - displays all the filters added to the inventory page, click the filter to edit it
- HTML/CSS - locations for changing front end content on the inventory page
- Page Meta - add/change basic meta information for the inventory page